Download expert-built N8N workflows and scale your business effortlessly.


A Comprehensive Guide to Self-Hosting n8n for Free on Google Cloud Using Docker Compose
Most small business owners pay hundreds of $ per month on automation tools like Zapier – just to move leads between forms, Google Sheets, and CRM. The truth? You can get similar (sometimes stronger) automation power – for FREE.
1/12/20266 min read
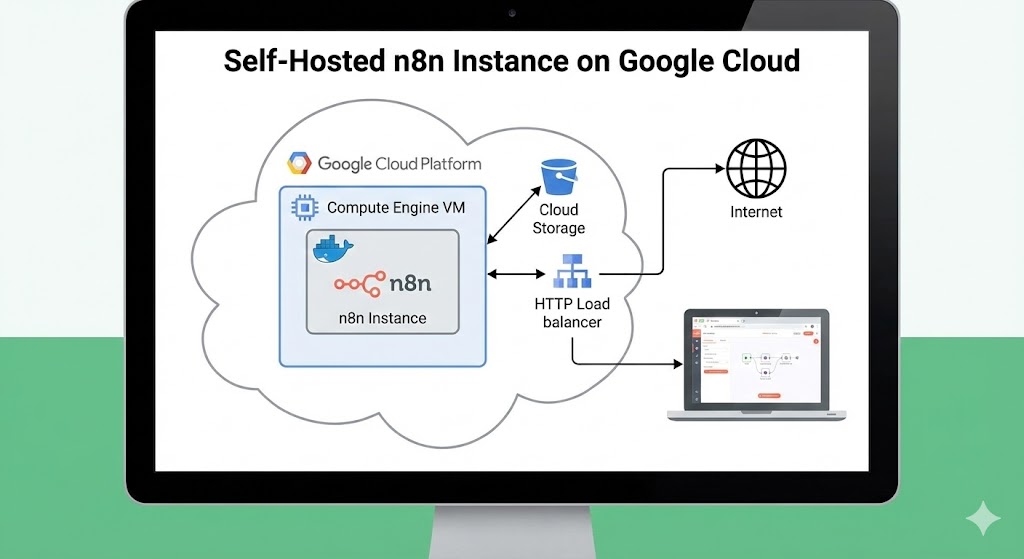
Introduction to Self-Hosting n8n
In recent months I've set up n8n infrastructure for small businesses running on Google Cloud Free Tier.
What does this give them in practice?
Automatic connection between forms, email, CRM, and Google Sheets
Automated lead follow-up – never miss a customer
Daily/weekly automated reports sent to email
Zero software cost as long as you stay within Free Tier limits
Instead of paying per "automation" and "execution", the business gets a 24/7 automation server working quietly in the background, removing repetitive manual work.
If you have a small/medium business and feel overwhelmed by repetitive tasks (data copying, email sending, lead tracking) – smart automation is no longer "just for big projects".
Setting Up Google Cloud Environment
To commence, you will need to create a Google Cloud account if you do not have one already. Once your account is set up, follow these steps to create a new project and enable billing:
Log in to the Google Cloud Console.
Create a new project.
Navigate to the "Billing" section and enable the free tier.
Ensure the Google Compute Engine API is enabled in your project.
After these initial steps, configure the necessary permissions and set up your network environment. It is advisable to use Virtual Private Cloud (VPC) for better security and resource management.
1. Create a New Project in Google Cloud
Log into your Google Cloud Console. Click the project dropdown at the top, then select "New Project". Name it something clear like n8n-automation-project. This keeps your n8n setup organized and separate from other cloud projects.
2. En2. Enable Compute Engine API
2. Enable Compute Engine API
With your new project selected, search "Compute Engine API" in the top search bar. Click the result, then hit "Enable". This unlocks virtual machine creation for your project.
3. Launch Compute Engine Dashboard
Search "Compute Engine" in the console to access the service. Go to VM Instances – you'll see a prompt to create your first instance. Click "Create Instance" to start building the VM that will run n8n.
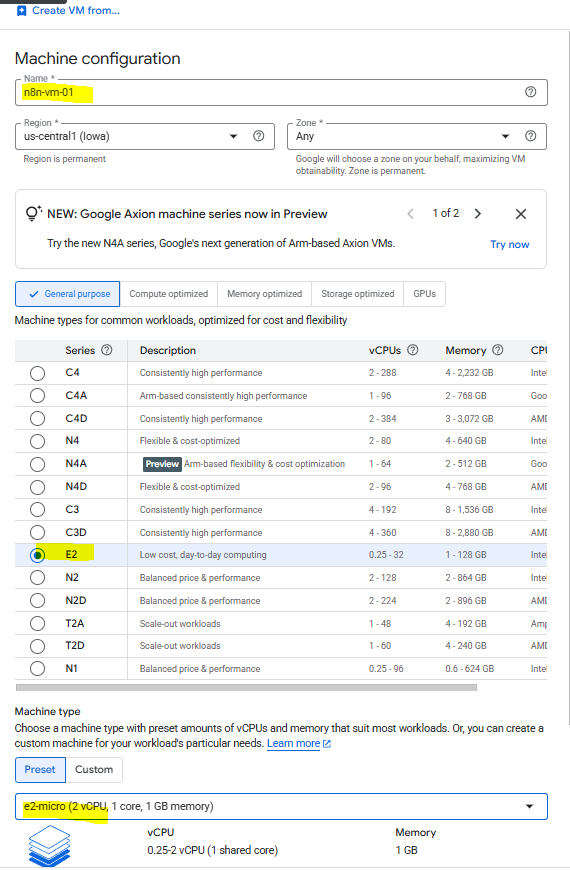
4. Configure Your Free Tier VM
Name your instance n8n-server. For Region/Zone, choose a free tier eligible location:
us-central1 (Iowa) ✅
us-west1 (Oregon) ✅
us-east1 (South Carolina) ✅
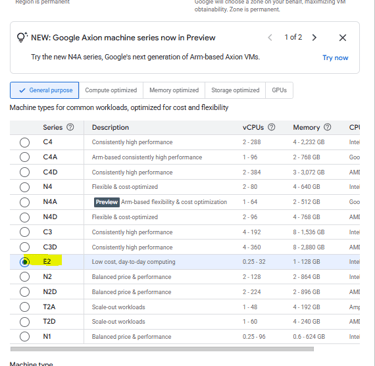
Select e2-micro machine type (free tier eligible, perfect for basic automations). This gives you 1 shared vCPU + 1GB RAM – enough for dozens of business workflows.
Next steps coming: Boot disk setup (Ubuntu 30GB), Docker install, domain pointing, SSL certificate, and n8n launch! 🚀
4.
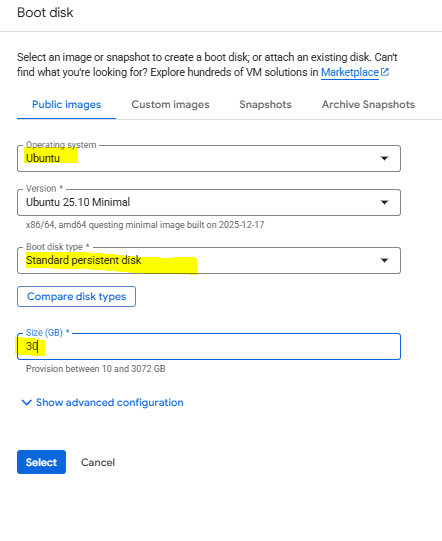
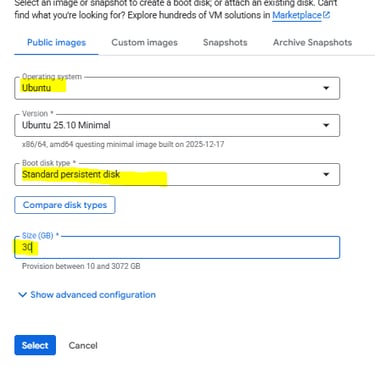
5. Configure Boot Disk (Ubuntu + Free Tier Settings)
Under the Boot Disk section, select Ubuntu as your operating system (latest LTS version recommended). Change the boot disk type to "Standard Persistent Disk" – this is crucial for staying within free tier limits.
Increase the default disk size to 30 GB (maximum free tier allowance). This gives you plenty of space for:
n8n workflow files and databases
Docker containers and logs
System updates and backups
Why Standard Persistent Disk? The default "Balanced" option incurs charges even in free tier. Standard PD keeps costs at $0.
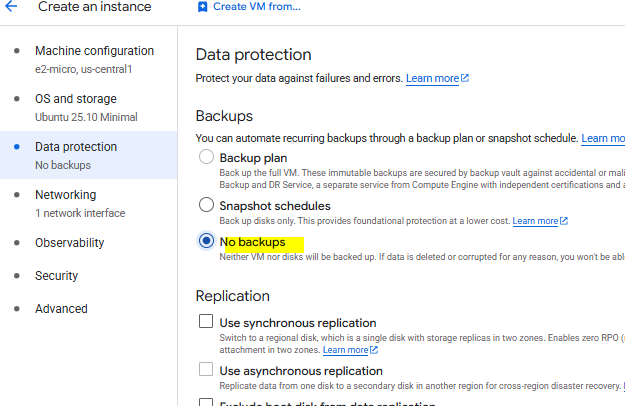
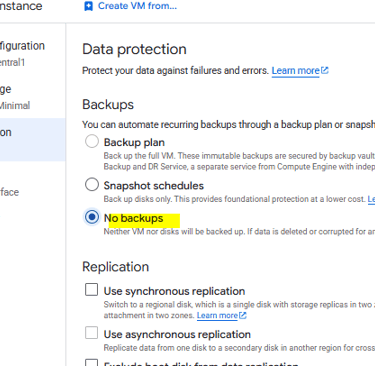
6.in THE data protection choose "No Backups" otherwise it will cost you money
the VM Instance
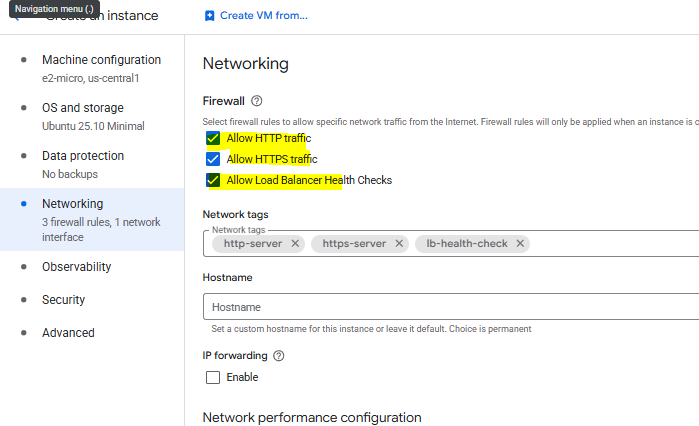
7. Firewall & Networking Setup (Enable Web Access)
Scroll down to Firewall settings and check these boxes:
✅ Allow HTTP traffic
✅ Allow HTTPS traffic
✅ Allow load balancer health checks
This opens ports 80/443 so your n8n instance becomes web-accessible once deployed.
Network Tags (optional but recommended): Add tag n8n-server – useful for future firewall rules or monitoring.
Hostname: Set a friendly name like n8n.yourdomain.com or automation-server (must match your domain setup later).
Click "Create" – your VM will spin up in ~2 minutes! You'll get an External IP address (save it – you'll need it for domain pointing).
VM Summary Now:
✓ e2-micro (Free Tier)
✓ us-central1 region
✓ Ubuntu 30GB Standard PD
✓ HTTP/HTTPS open
✓ Tagged & named
8. Launch the VM
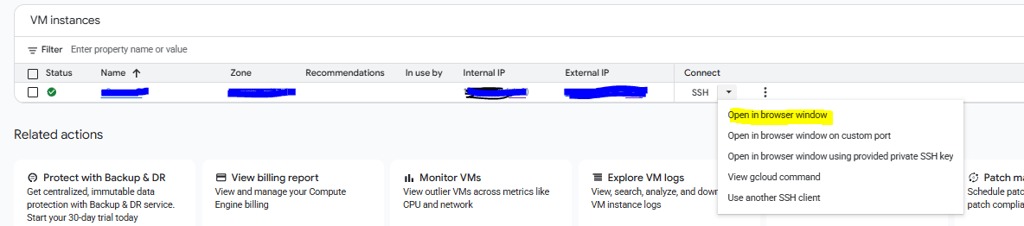
VM is Live! 🎉 Your Google Cloud server is now running. Here's how to connect:
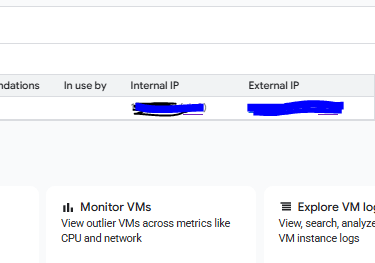
Find External IP: On the VM Instances page, copy the External IP address (e.g., 34.123.45.67). Save this – you'll need it for DNS setup.
Connect via Browser SSH:
Click the down arrow next to SSH button
Select "Open in browser window"
Browser opens a terminal – you're now inside your Ubuntu server! 🖥️
You're 80% done! Next steps (coming right up):
Point domain/subdomain to your External IP
Install Docker + Docker Compose
Deploy n8n with one command
Access your automation dashboard via HTTPS
9. DNS Setup + Server Prep (Domain + Docker Install)
Step 2: Point Domain to Your VM (Essential for HTTPS)
To access n8n securely via n8n.yourdomain.com (not raw IP), create an A Record:
Log into your domain provider (GoDaddy, Namecheap, Hostinger, etc.)
Go to DNS Settings for your domain
Add A Record:
Name/Host: n8n (or your subdomain)
Value/IP: Your VM's External IP (from Step 7)
TTL: 300s (5 min) or default
Propagation: 5–30 minutes (check with checkdns). Now your domain points to the server!
Step 3: Update Server + Install Docker/Nano
In your browser SSH terminal (from Step 7), copy‑paste these one by one:
sudo apt update && sudo apt upgrade -y
sudo apt-get install ca-certificates curl
sudo apt install nano
sudo install -m 0755 -d /etc/apt/keyrings
sudo curl -fsSL https://download.docker.com/linux/ubuntu/gpg -o /etc/apt/keyrings/docker.asc
sudo chmod a+r /etc/apt/keyrings/docker.asc
echo "deb [arch=$(dpkg --print-architecture) signed-by=/etc/apt/keyrings/docker.asc] https://download.docker.com/linux/ubuntu $(. /etc/os-release && echo "${UBUNTU_CODENAME:-$VERSION_CODENAME}") stable" | sudo tee /etc/apt/sources.list.d/docker.list > /dev/null
sudo apt-get update
sudo apt-get upgrade
sudo apt-get install docker-ce docker-ce-cli containerd.io docker-buildx-plugin docker-compose-plugin
curl -fsSL https://get.docker.com -o get-docker.sh
sudo sh get-docker.sh
sudo usermod -aG docker $USER
sudo curl -L "https://github.com/docker/compose/releases/latest/download/docker-compose-$(uname -s)-$(uname -m)" -o /usr/local/bin/docker-compose
sudo chmod +x /usr/local/bin/docker-compose
Run the following commands to confirm that Docker and Docker Compose are installed correctly and to check their versions
:# Check docker version
docker --version
# Check docker compose version
docker compose version
10. n8n Config Files (.env + Local Files + Docker Compose)
Step 4: Create .env Configuration File
In your SSH terminal, run:
cd ~
mkdir n8n-compose
cd n8n-compose
nano .env
Copy-paste this into Nano (replace YOUR_DOMAIN and YOUR_EMAIL):
DOMAIN_NAME=YourDomain.com
SUBDOMAIN=YourSubDomain
GENERIC_TIMEZONE=YourTimeZone(Example:Europe/London)
SSL_EMAIL=YourEmail
Save & exit: Ctrl+O → Enter → Ctrl+X
Step 5: Create Local Files Directory
mkdir local-files
ls -la
You should see .env + local-files folder. This stores your workflow files persistently.
Step 6: Create docker-compose.yml
nano docker-compose.yml
and copy code from here : n8n website
version: '3.8'
services: traefik:
image: traefik:
etc.....
Save & exit: Ctrl+O → Enter → Ctrl+X
10. Launch n8n + Create Owner Account (Final Steps!)
Step 7: Launch Everything with One Command
In your SSH terminal (still in n8n-compose folder):
sudo docker compose up -d
What happens (takes ~3-5 minutes):
Traefik reverse proxy starts (handles HTTPS/SSL)
n8n container launches
Auto-generates SSL certificate via Let's Encrypt
Creates acme.json for certificates (chmod 600 automatically)
Check status:
sudo docker compose ps
Both traefik and n8n should show "Up"
To stop later (reference only):
sudo docker compose down
Step 8: First Login & Owner Account Setup
Wait 2-3 minutes for SSL certificate generation
Open browser → https://n8n.yourdomain.com
Setup screen appears – enter:
First Name / Last Name
Email address (same as .env)
Strong password
Click Continue → n8n Dashboard loads! 🎉
Your FREE n8n is LIVE!
11. Unlock Paid Features for FREE (Fair Code License)
Right after creating your owner account, you'll see a prompt: "Enter your email to activate n8n's Fair Code license"
Quick Activation Steps:
Enter your email (same one from .env file)
Check your inbox – n8n sends a license key instantly
Copy the key and go to Settings → Usage and Plan
Click "Enter activation key" → paste key → Activate
What you unlock (no cost!):
✅ Workflow History (see past runs)
✅ Editor Debugging (step-by-step testing)
✅ Folders (organize workflows)
✅ Execution Search (find any automation run)
✅ Lifetime access for self-hosted
Next: Build your first workflow! Want examples for:
Lead capture → CRM → Email follow-up
Google Sheets → Daily reports
WhatsApp → Automation trigger
DM "workflow" for 3 ready-made templates!
[Complete guide + screenshots in comments]
I now build complete solutions for businesses:
n8n setup in the cloud, connected to your tools, and automations customized exactly to your business processes.
Want to see if this fits your business too?
DM me or comment with the word: automation – and I'll send you details + examples of processes we can automate for you. contact us


מעוניינים שנחזור אליכם? השאירו הודעה
058-4005318
זכויות שמורות ל- לBizNova
_____________________________________________________________________________________________________